.NET MAUI - Creating a New Project

Introduction
This article is the third article in my PDF Splitter series but the first one in which we start to drill down into the code.
Creating the Project
For this tutorial, I'm going to be using Visual Studio, in my case, I'm using Visual Studio Community, which is available to download for free from here.
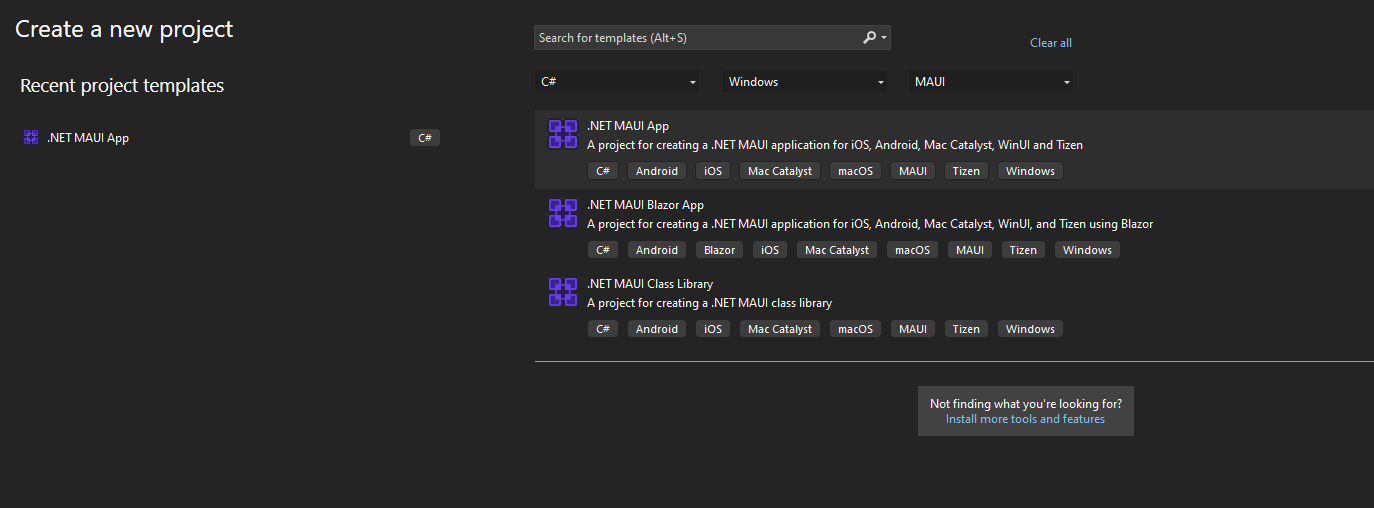
Create a new .NET MAUI App from the start-up menu, by selecting the top option in the list as displayed below.
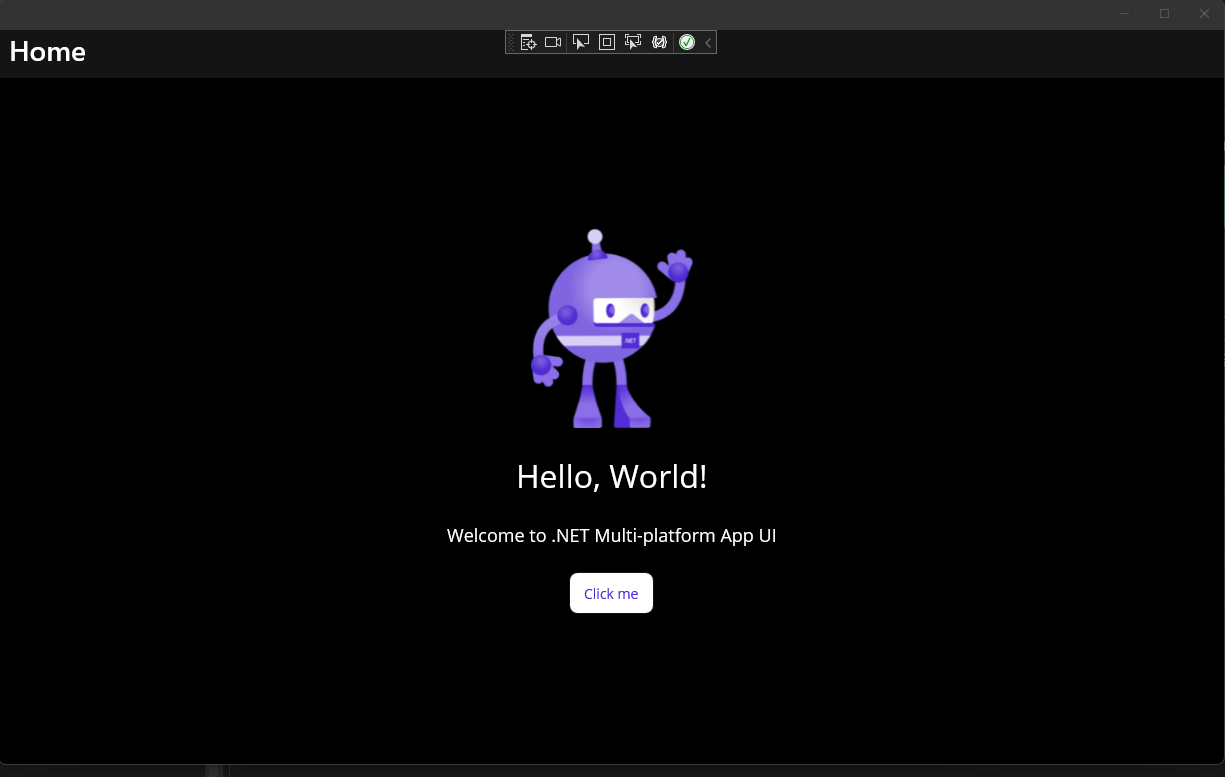
This out-the-box gives us a starting project to work with, that can be built and executed, so we already have our first .NET MAUI application up and running!
The Default Files
The default application is compiled from a handful of files provided in the default solution:
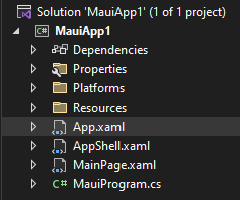
MauiProgram.cs - This is the entry point of our application. We can register all the required views, view models and services with our dependency injection container here. We will cover the Model-View-ViewModel pattern later in this article.
App.xaml - The App.xaml file has a corresponding App.xaml.cs file. Between them, they describe the host window and code for the application. There is very little code in here, and we will make only minor modifications to this file for our application.
AppShell - The application shell (xaml and cs) files provide the main host of our application components. It is where we can code our static components such as menu bars and status bars and handle navigation.
All xaml files for MAUI have a corresponding cs file. They are usually bundled together in the Visual Studio solution explorer and can be seen by expanding the xaml file displayed.
The MVVM Design Pattern
The Model-View-ViewModel (MVVM) design pattern was a new design pattern introduced when Microsoft first released Windows Presentation Foundation (WPF) as an alternative UI framework for .NET Windows applications to the traditional Winforms application.
It has been covered extensively over the years, so I'm not going to go into too much detail here. The main driving force behind the MVVM was to allow the UI code and the business logic to be separated, in a similar vein to how MVC might work in a web application. There are, obviously, 3 main components to the design pattern:
View - This is what the user see's, and is described by the Xaml files that we create. Whilst every Xaml file has a corresponding cs file, which could contain a lot of the 'code-behind' functionality, we should look to separate that functionality into a separate view model.
View Model - The view model contains all the commands and properties that we'd look to interact with from a UI component. We inject these view models into the 'code behind' cs file and bind our Views to them. As such the view will have a dependency on the view model, but the view model has no knowledge of the view. This makes our code more 'loosely coupled'.
Model - The term model in this instance can refer to the business logic driving the application itself. The view models will trigger state changes in the business logic and the view will react to those via changes in properties on the view models.
This separation of concerns design pattern allows specialist UI/UX designers to focus on only that aspect of an application, and c# developers to focus on the business logic. Additionally, because there are no dependencies directly to the views, it can make our applications much more testable as we can create unit tests to test the majority of the code without having to directly interact with the UI itself.
Now we've covered the default project structure and design patterns, let's write some code!
The First Steps
Before we do anything else, let's create some new directories for our application to help keep our code structures. To start with, I created 3 directories, 'Models', 'Views' and 'ViewModels'.
Then I will move the AppShell.xaml to the Views directory as this is the first view we will use.
To keep within our MVVM design, we then need to update our application to allow us to provide a view model for the AppShell.xaml view. However, as the AppShell does not get initialised by our dependency injection (DI) container, we cannot use the standard method of just registering the views and view models and letting DI handle the rest. We need to rather pass it through the App.cs to where the AppShell is instantiated.
Let's create an AppShellViewModel inside our ViewModels folder:
public class AppShellViewModel
{
    public AppShellViewModel()
    {

    }
}
For now, it's pretty simple, but we'll extend this shortly.
We then need to register our view model to allow it to work with dependency injection so we can pass it into our App.cs later.
Inside the MauiProgram.cs we can create new RegisterViews and RegisterViewModels functions and then register both our AppShell view and AppShellViewModel with our application builder through these functions:
public static class MauiProgram
{
    public static MauiApp CreateMauiApp()
    {
        var builder = MauiApp.CreateBuilder();
        builder
            .UseMauiApp<App>()
            .RegisterViewModels()
            .RegisterViews()
            .ConfigureFonts(fonts =>
            {
                fonts.AddFont("OpenSans-Regular.ttf", "OpenSansRegular");
                fonts.AddFont("OpenSans-Semibold.ttf", "OpenSansSemibold");
            });
        return builder.Build();
    }

    public static MauiAppBuilder RegisterViews(this MauiAppBuilder builder)
    {
        builder.Services.AddSingleton<AppShell>();
        return builder;
    }

    public static MauiAppBuilder RegisterViewModels(this MauiAppBuilder builder)
    {
        builder.Services.AddSingleton<AppShellViewModel>();
        return builder;
    }
}
We can then inject the view model into our AppShell.cs file and tell the application to use the view model as our binding context. This tells the AppShell view to use the view model as its source of data, commands and events rather than the default AppShell.cs file:
public partial class AppShell : Shell
{
    public AppShell(AppShellViewModel viewModel)
    {
        InitializeComponent();
        BindingContext = viewModel;
    }
}
And because our AppShell is initialised inside the App.cs we have to use our DI to pass the view model to the App.cs first, and then pass that through to the AppShell:
public partial class App : Application
{
    public App(AppShellViewModel viewModel)
    {
        InitializeComponent();
        MainPage = new AppShell(viewModel);
    }
}
Model Binding and INotifyPropertyChanged
One final item I like to include in my projects is a base class to handle property changes, which can then be inherited by and view model classes.
One of the key concepts of MAUI and using model binding is how we tell the view when something has changed and needs updating.
The way we do this is through the implementation of the INotifyPropertyChanged interface, whereby we trigger the OnPropertyChanged event which is then handled by the view through the binding.
public abstract class BindableModelBase : BindableObject, INotifyPropertyChanged
{
    protected void NotifyPropertyChanged<T>(Expression<Func<T>> property)
    {
        if(this.OnPropertyChanged!= null)
        {
            OnPropertyChanged(GetMemberInfo(property).Name);
        }
    }

    private static MemberInfo GetMemberInfo(LambdaExpression expression)
    {
        var e = expression.Body as MemberExpression;
        return e.Member;
    }
}
By inheriting the above class in our view models, we can simply call:
NotifyPropertyChanged(() => PropertyName);
Whenever we update a property value, this should trigger the view to refresh any values that are bound to that property.
Now that we have got a base structure in place, we're ready to start adding our file menu, a main home page and some routing.