.NET MAUI - Working with PDF Files Pt. 2

Introduction
In the previous article, we created a PDF model and service to allow us to work with and track PDF pages. The next step is to build the UI to allow us to interact with the service.
To do this we will create a single 'view' and a 'view model' (see article on MVVM for more detail on the design patterns), and controls for displaying the list of pages, page content and any selected pages.
Updating the File Menu
Before we can do any of the above, we should first update our file menu to allow us to select a PDF file to load and display.
Add the following to our AppShellViewModel.cs to inject out pdf service and use the inbuilt MAUI FilePicker control to allow us to select and load a PDF file.
Note: The code also includes navigation to route to our PDF View page that we previously created. We'll be adding code to this during this article so we should start to see everything come together.
public class AppShellViewModel
{
    private IPdfService _pdfService;

    public ICommand OnMenuItemClickedCommand { get; private set; }
    public ICommand OnMenuItemClosePdfClickedCommand { get; private set; }

    public ICommand OnMenuItemAboutClickedCommand { get; private set; }

    private bool PdfOpen = false;

    public AppShellViewModel(IPdfService pdfService)
    {
        _pdfService= pdfService;

        OnMenuItemClickedCommand = new Command<string>(async (s) => await OnMenuItemClicked(s));
        OnMenuItemClosePdfClickedCommand = new Command<string>(async (s) => await OnMenuItemClicked(s), (s) => PdfOpen);

        OnMenuItemAboutClickedCommand = new Command(DisplayAbout);
    }

    public async Task OnMenuItemClicked(string item)
    {
        switch (item) {
            case "Exit":
                Application.Current.Quit();
                break;
            case "Open":
                await SelectFile();
                break;
            case "Close":
                await CloseFile();
                break;
            default:
                break;
        }
    }

    public async Task SelectFile()
    {
        var options = new PickOptions()
        {
            FileTypes = FilePickerFileType.Pdf
        };

        var fileResult = await FilePicker.PickAsync(options);

        if (fileResult != null)
        {
            await _pdfService.LoadPdf(fileResult.FullPath);

            PdfOpen = true;
            (OnMenuItemClosePdfClickedCommand as Command).ChangeCanExecute();
            await Shell.Current.GoToAsync(nameof(PdfViewPage));
        }
    }

    public async Task CloseFile()
    {
        _pdfService.UnloadPdf();
        PdfOpen = false;
        (OnMenuItemClosePdfClickedCommand as Command).ChangeCanExecute();
        await Shell.Current.GoToAsync($"//{nameof(MainPage)}");
    }

    public void DisplayAbout()
    {
        var about = new Window(new About(new AboutViewModel()));
        about.Width = 650;
        about.Height = 300;
        Application.Current.OpenWindow(about);
    }
}
Creating the Page List Control
The first thing we need to do is create a control to display the preview of pages from within our PDF File.
By breaking our page down into controls we can build quite complex UI's with simple building blocks. Our page list control is simply a list view nested in a scroll view, within which we provide a custom data template that is repeated for each page.
The list view is bound to our pages list, and we will also provide a function to allow an item to be selected, in this case, we've limited it to a single item. These bindings will come from our PdfViewPage xaml view and PdfViewPageViewModel which we will complete at the end of this article.
The template itself is just a grid with the image control to bind to our page item preview and a label that binds to the page item name.
It is important to mention how the binding context of controls is set to match the x:Name in the ContentView (usually just set to 'this') to handle the scope of the bindings.
<ContentView xmlns="http://schemas.microsoft.com/dotnet/2021/maui"
             xmlns:x="http://schemas.microsoft.com/winfx/2009/xaml"
             x:Class="PdfSplitter.Controls.PdfPages"
             x:Name="this">
    <ScrollView BindingContext="{x:Reference this}">
        <ListView ItemsSource="{Binding Pages}" SelectionMode="Single" SelectedItem="{Binding SelectedPage}">
            <ListView.ItemTemplate>
                <DataTemplate>
                    <ViewCell>
                        <Grid Padding="10" MaximumWidthRequest="120">
                            <Grid.RowDefinitions>
                                <RowDefinition Height="6*" />
                                <RowDefinition Height="auto" />
                            </Grid.RowDefinitions>
                            <Grid.ColumnDefinitions>
                                <ColumnDefinition Width="*" />
                            </Grid.ColumnDefinitions>
                            <Image Grid.Row="0" Grid.Column="0" Margin="0, 5, 0, 0" Source="{Binding Preview}" />
                            <Label Grid.Row="1"  Grid.Column="0" Text="{Binding PageName}" HorizontalOptions="Center" Margin="0" />
                        </Grid>
                    </ViewCell>
                </DataTemplate>
            </ListView.ItemTemplate>
        </ListView>
    </ScrollView>
</ContentView>
Creating the Page View Component
In a similar fashion to the page list control for displaying the preview, we can create another control for displaying the 'selected' page. In this control, we simply create a 2-row grid, as want to display an image control which we bind to our page 'PageView' ImageSource function created in the previous article and add a button to allow us to select and add the page to our 'extracted' pdf.
<?xml version="1.0" encoding="utf-8" ?>
<ContentView xmlns="http://schemas.microsoft.com/dotnet/2021/maui"
             xmlns:x="http://schemas.microsoft.com/winfx/2009/xaml"
             x:Name="this"
             x:Class="PdfSplitter.Controls.PdfPageContent">
    <Grid BindingContext="{x:Reference this}">
        <Grid.RowDefinitions>
            <RowDefinition Height="1*" />
            <RowDefinition Height="auto" />
        </Grid.RowDefinitions>
        <Image Grid.Row="0" Margin="0, 10, 0, 0" Source="{Binding Page.PageView}"  />
        <Button
            x:Name="SelectPage"
            Grid.Row="1"
            Margin="5"
            Text="Add to Extracted File"
            Command="{Binding SelectPageCommand}"
            SemanticProperties.Hint="Add page to extracted document."
            HorizontalOptions="Center" />
    </Grid>
</ContentView>
Creating the Selected Items Control
Finally, we need a control to display our selected pages. This is very similar to our preview control in that it will display the preview image and the page name of selected pages. However, in this instance, we will display the pages horizontally rather than vertically, and also add a button to allow us to remove a selected page and return it to our original document page list, in case we select a page incorrectly.
<?xml version="1.0" encoding="utf-8" ?>
<ContentView xmlns="http://schemas.microsoft.com/dotnet/2021/maui"
             xmlns:x="http://schemas.microsoft.com/winfx/2009/xaml"
             xmlns:fonts="clr-namespace:PdfSplitter.Fonts"
             x:Name="this"
             x:Class="PdfSplitter.Controls.PdfSelectedPages">
    <ScrollView Orientation="Horizontal">
        <StackLayout BindingContext="{x:Reference this}" BindableLayout.ItemsSource="{Binding SelectedPages}" Orientation="Horizontal">
            <BindableLayout.ItemTemplate>
                <DataTemplate>
                    <Grid Padding="5,2,0,2" MaximumHeightRequest="180">
                        <Grid.RowDefinitions>
                            <RowDefinition Height="1*" />
                            <RowDefinition Height="auto" />
                        </Grid.RowDefinitions>
                        <Grid.ColumnDefinitions>
                            <ColumnDefinition Width="*" />
                        </Grid.ColumnDefinitions>
                        <Image Grid.Row="0" Grid.Column="0" Margin="0" Source="{Binding Preview}" ZIndex="0" />
                        <Label Grid.Row="1"  Grid.Column="0" Text="{Binding PageName}" HorizontalOptions="Center" Margin="0" />
                        <Button
                            Grid.Row="0"
                            Grid.Column="0"
                            Margin="2"
                            Padding="0"
                            CornerRadius="10"
                            BackgroundColor="DarkRed"
                            BorderColor="Black"
                            BorderWidth="1"
                            TextColor="White"
                            FontAttributes="Bold"
                            Text="{x:Static fonts:MaterialDesignRegular.Delete}"
                            FontFamily="Icons"
                            FontSize="20"
                            WidthRequest="10"
                            HeightRequest="10"
                            HorizontalOptions="End"
                            VerticalOptions="Start"
                            ZIndex="1"
                            SemanticProperties.Hint="Remove page from document to extract."
                            Command="{Binding Source={RelativeSource AncestorType={x:Type StackLayout}}, Path=BindingContext.RemovePageCommand}"
                            CommandParameter="{Binding PageName}"/>
                    </Grid>
                </DataTemplate>
            </BindableLayout.ItemTemplate>
        </StackLayout>
    </ScrollView>
</ContentView>
The Problem with MAUI CollectionView
When originally building this application the plan was to use the CollectionView component for the display of the collection of the selected pages above, as this is more powerful than the list view. However, at the time of writing, there is a well-documented error in this component which means it does not redraw correctly in the display when the underlying observable collection is updated.
The Horizontal StackLayout Workaround
Thankfully, we can work around the issue by using a StackLayout component as an alternative, setting the orientation to Horizontal as shown in the above control.
I have decided to call this a workaround, rather than a solution because the above is a bug rather than a feature, and as such may at some point be fixed, although for now, that does not seem to be a priority.
Adding the Controls to Our Page View
All that remains to do to display our PDF is to add our newly created controls to our PdfViewPage xaml:
<?xml version="1.0" encoding="utf-8" ?>
<ContentPage xmlns="http://schemas.microsoft.com/dotnet/2021/maui"
             xmlns:x="http://schemas.microsoft.com/winfx/2009/xaml"
             xmlns:Controls="clr-namespace:PdfSplitter.Controls"
             x:Class="PdfSplitter.Views.PdfViewPage"
             x:Name="pdfExtractorViewPage">

    <Grid>
        <Grid.RowDefinitions>
            <RowDefinition Height="4*" />
            <RowDefinition Height="auto" />
        </Grid.RowDefinitions>
        <Grid.ColumnDefinitions>
            <ColumnDefinition Width="5*" />
            <ColumnDefinition Width="*" />
        </Grid.ColumnDefinitions>
        <Controls:PdfPageContent Grid.Row="0" Grid.Column="0" Page="{Binding SelectedPageItem}" SelectPageCommand="{Binding OnItemSelectedCommand}" />
        <Controls:PdfPages Grid.Row="0" Grid.Column="1" Grid.RowSpan="2" Pages="{Binding Items}" SelectedPage="{Binding SelectedPageItem, Mode=TwoWay}" />
        <Controls:PdfSelectedPages  Grid.Row="1" Grid.Column="0" SelectedPages="{Binding SelectedItems}" RemovePageCommand="{Binding OnItemRemovedCommand}" />
    </Grid>
</ContentPage>
And to update our view model to include the properties and methods that our controls will bind to:
public class PdfViewPageViewModel : BindableModelBase
{
    private IPdfService _pdfService;
    private PdfPageItem _selectedPageItem;
    public ICommand OnItemSelectedCommand { get; private set; }
    public ICommand OnItemRemovedCommand { get; private set; }

    public PdfViewPageViewModel(IPdfService pdfService, ISavePdfService savePdfService)
    {
        _pdfService = pdfService;
        _savePdfService = savePdfService;
        OnItemSelectedCommand = new Command(SelectPage);
        OnItemRemovedCommand = new Command<string>(RemovePage);
    }

    public ObservableCollection<PdfPageItem> Items => _pdfService.Items;

    public ObservableCollection<PdfPageItem> SelectedItems => _pdfService.SelectedItems;

    public PdfPageItem SelectedPageItem
    {
        get
        {
            if(_selectedPageItem == null && _pdfService.Items.Count > 0)
            {
                _selectedPageItem = _pdfService.Items[0];
            }
            return _selectedPageItem;
        }
        set
        {
            _selectedPageItem = value;
            NotifyPropertyChanged(() => SelectedPageItem);
        }
    }

    public bool PdfOpen { get; private set; }

    public void SelectPage()
    {
        if(_selectedPageItem != null)
        {
            _pdfService.SelectItem(_selectedPageItem);

            int selectedItemPageNo = _selectedPageItem.PageNumber;

            SelectedPageItem = _pdfService.Items.FirstOrDefault(x => x.PageNumber > selectedItemPageNo);

            NotifyPropertyChanged(() => DisplaySaveButton);
        }
    }

    public void RemovePage(string pageName)
    {
        var pageToRemove = SelectedItems.FirstOrDefault(x => x.PageName == pageName);

        if (pageToRemove != null)
        {
            _pdfService.UnselectItem(pageToRemove);
            NotifyPropertyChanged(() => Items);
        }
    }
}
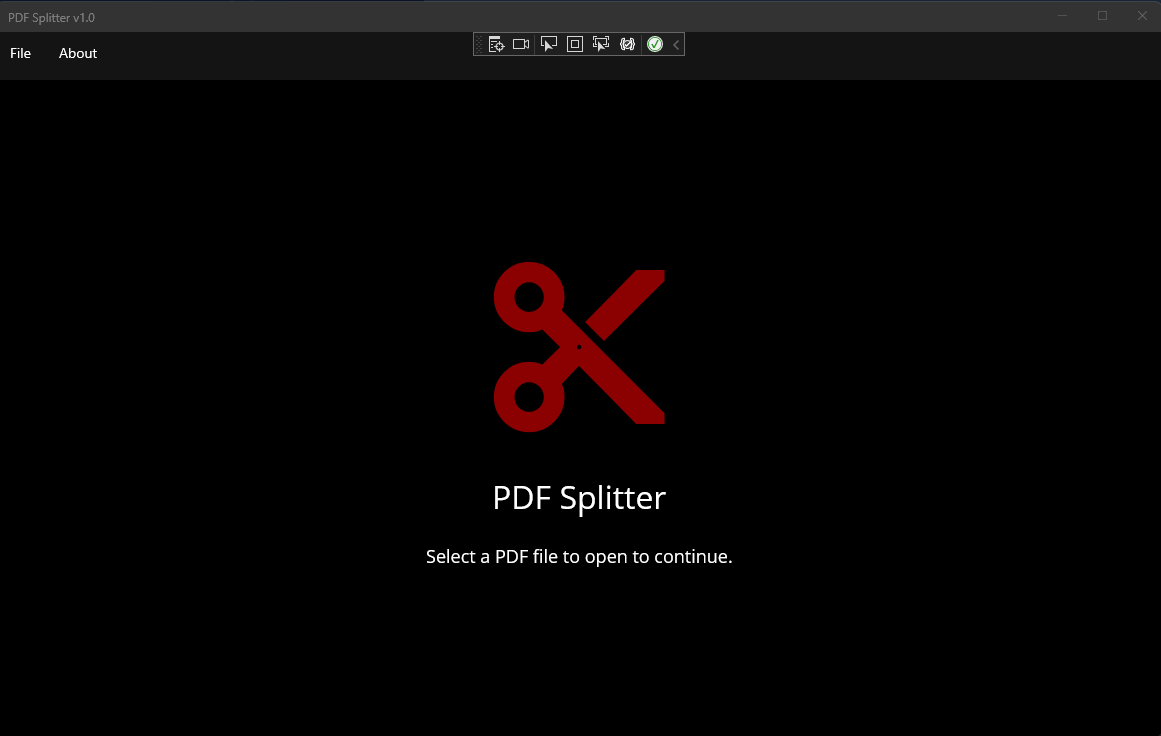
Finishing Up
We should now be able to launch our application and it should look similar to the below. I have added some UI tweaks and changed the background image, implementation can be obtained from the GitHub repository.
And after opening a PDF file:
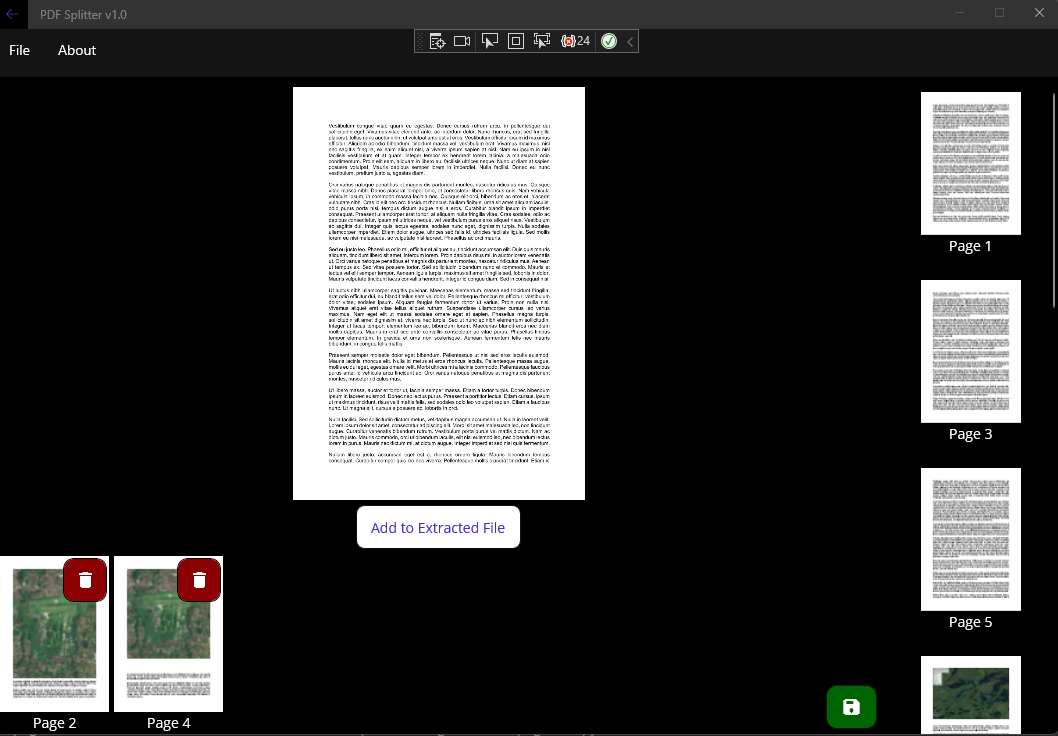
The final step is to implement the 'save' PDF functionality, which can be triggered as in the above image by way of clicking the green button. This will be the topic of my next article.