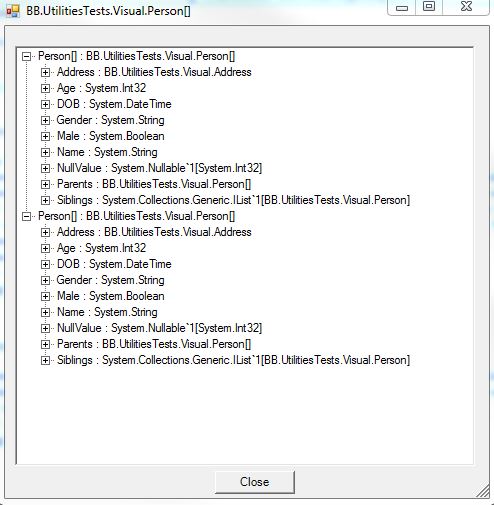
Often, when building visual applications I find that as I build the applications in stages, there are often times when I’d like to be able to quickly view what data is in the application memory without having to build the UI and link the data to a series of controls.
To solve this problem, I created a simple object explorer dialog that will accept an object as a parameter, and from that display the object and all properties and sub objects as a tree view.
This is surprisingly easy to do, and can be broken down into 3 steps.
We start with a simple Windows form with just a tree view control and a close dialog button:

We can then go to the code behind and we need a couple of methods to build the tree. The first is the recursive method that calls itself repeatedly until the tree has been built:
private void CreateChildNode(TreeNode parent, object o)
        {
            Type t = o.GetType();
            IList<PropertyInfo> props = new List<PropertyInfo>(t.GetProperties());
            foreach (PropertyInfo prop in props)
            {
                object propValue = prop.GetValue(o, null);
                TreeNode tnProp = new TreeNode(prop.Name + " : " + prop.PropertyType.ToString());
                string value = propValue == null ? "Null value" : propValue.ToString();
                if (value == string.Empty)
                {
                    value = "No Value Specified";
                }
                TreeNode tnValue = new TreeNode(value);
                parent.Nodes.Add(tnProp);
                if (propValue is ICollection)
                {
                    IEnumerable items = propValue as IEnumerable;
                    int nodeNo = 0;
                    foreach (object i in items)
                    {
                        nodeNo++;
                        TreeNode tnNo = new TreeNode(nodeNo.ToString());
                        tnProp.Nodes.Add(tnNo);
                        this.CreateChildNode(tnNo, i);
                    }
                    if (nodeNo == 0)
                    {
                        // Empty collection
                        tnProp.Nodes.Add("Empty");
                    }
                }
                else if (propValue != null && propValue.GetType().Module.ScopeName != "CommonLanguageRuntimeLibrary")
                {
                    if (propValue.GetType().GetProperties().Length > 1)
                    {
                        this.CreateChildNode(tnProp, propValue);
                    }
                    else
                    {
                        tnProp.Nodes.Add(tnValue);
                    }
                }
                else
                {
                    tnProp.Nodes.Add(tnValue);
                }
            }
        }
As you can see, in the above code we get the object type, the object type name, handle any null values, and then we create a node and do one of 3 things:
- If the object implements ICollection, we iterate through all the items or we note the node as ‘Empty’.
- If the object is a custom object then we either display its value, or if it has multiple properties we iterate through those.
- If the object is a system type (string, int, etc.) we display the value.
We also need to create a separate starter method to create the initial parent node and for handling the possibility the initial object we’re given is a collection. If this is the case we’ll actually be creating and displaying multiple trees. The code for this is very similar to the above:
private void CreateTree(object o)
       {
           Type t = o.GetType();
           this.Text = t.ToString();
           TreeNode topNode = new TreeNode(t.Name.ToString() + " : " + t.ToString());
           if (o is ICollection)
           {
               foreach (object i in o as IEnumerable)
               {
                   topNode = new TreeNode(t.Name.ToString() + " : " + t.ToString());
                   this.CreateChildNode(topNode, i);
                   this.tvExplorer.Nodes.Add(topNode);
               }
           }
           else
           {
               topNode = new TreeNode(t.Name.ToString() + " : " + t.ToString());
               this.CreateChildNode(topNode, o);
               this.tvExplorer.Nodes.Add(topNode);
           }
       }
The final step is to set the initialiser to start the process off:
public ObjectExplorer(object obj)
        {
            InitializeComponent();
            this.CreateTree(obj);
        }
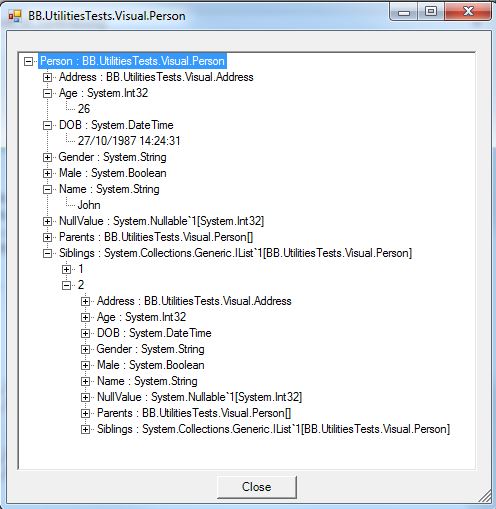
To use the object explorer we can then pass it any object and it will iterate through and display the contents:
Person p = new Person();
Person mum = new Person { Name = "Jill", DOB = DateTime.Now.AddYears(-56), Male = false, Gender = "Female" };
Person dad = new Person { Name = "Jack", DOB = DateTime.Now.AddYears(-59), Male = true, Gender = "Male" };
Person brother = new Person { Name = "James", DOB = DateTime.Now.AddYears(-22), Male = true, Gender = "Male" };
Person sister = new Person { Name = "Jen", DOB = DateTime.Now.AddYears(-18), Male = false, Gender = "Female" };
p.Siblings = new List<Person> { brother, sister };
p.Parents = new Person\[\] { mum, dad };
ObjectExplorer exp = new ObjectExplorer(p);
exp.ShowDialog();
Will give us:
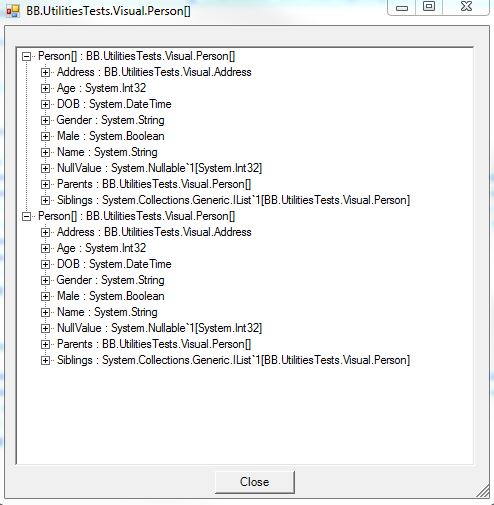
And if we pass a collection as an object:
Person mum = new Person { Name = "Jill", DOB = DateTime.Now.AddYears(-56), Male = false, Gender = "Female" };
Person dad = new Person { Name = "Jack", DOB = DateTime.Now.AddYears(-59), Male = true, Gender = "Male" };
var Parents = new Person\[\] { mum, dad };
ObjectExplorer exp = new ObjectExplorer(Parents);
exp.ShowDialog();
The post C# Visual Object Explorer Dialog appeared first on Talking I.T. Through.
About the author
- Principal engineer. C#/.NET, AI tooling, and IoT. Always building.
Comments
Join the discussionNo comments yet. Be the first to comment.
Talking I.T. Through
A series of articles imported from my previous blog hosted at https://www.talkingitthrough.co.uk.


